Elementor’s popups offer a sleek solution for enhancing the modernity of mobile menus. However, a common issue arises with anchor links within them. By default, when an anchor link is added to Elementor’s popup menu and clicked on, the page smoothly scrolls to the designated section but fails to close automatically. Subsequently, when users close the popup, they find themselves back at the page’s top.
This inconvenience has posed a significant challenge for many of us. Fortunately, a solution now exists, requiring nothing more than copying a code snippet and applying a class. Let me guide you through the process step by step.
First, What is an Anchor Link?
Before we proceed, let’s ensure we’re aligned on the concept of an anchor link and its functionality.
An anchor link serves as a hyperlink that, upon clicking, directs the web page to scroll to a predetermined position. This feature proves incredibly beneficial, particularly for single-page websites equipped with menus that facilitate navigation across various sections of the webpage.
Step 1: Creating Your Menu and Sliding Popup Menu
If you haven’t already crafted your menus, begin by creating one to suit your website’s design and navigation needs. Additionally, set up an Elementor Menu Popup, ensuring it reflects your custom styles and brand identity. Remember to activate the trigger on the item that will initiate the popup. Once your slide-out menu is prepared and configured according to your preferences, you’re ready to proceed to the next steps.
Step 2: Adding Code Snippet
In your WordPress Dashboard, locate the Elementor Custom Code section (or use any code snippet alternative plugin such as FluentSnippets). Once found, proceed to add a new code snippet. Before activating/publishing the snippet, ensure that jQuery is being loaded on your website. Then, copy and paste the provided code snippet into the designated area and save your changes.
Typically, you’ll set the conditions for the entire site. However, if your slide-out menu is exclusively featured on specific pages, you’ll need to adjust the code conditions accordingly.
<script type="text/javascript">
	jQuery(document).ready(function($) {
		jQuery(document).on('elementor/popup/show', (event, id, instance) => {

			// Change this number with your Popup ID
			if (id !== 672) {
				return;
			}

			let clickTarget;

			if($('.mariocj-anchor-menu .menu-item').length){
				clickTarget = '.mariocj-anchor-menu .menu-item';
			}

			if($('.mariocj-anchor-menu .elementor-icon-list-item').length){
				clickTarget = '.mariocj-anchor-menu  .elementor-icon-list-item';
			}

			if($('.mariocj-anchor-menu .elementor-button-link').length){
				clickTarget = '.mariocj-anchor-menu  .elementor-button-link';
			}


			$( document ).on( 'click',clickTarget, function( event ) {
				elementorProFrontend.modules.popup.closePopup( {id: id}, event )

			});
		});
	});
</script>
Step 3: Editing the Code Snippet
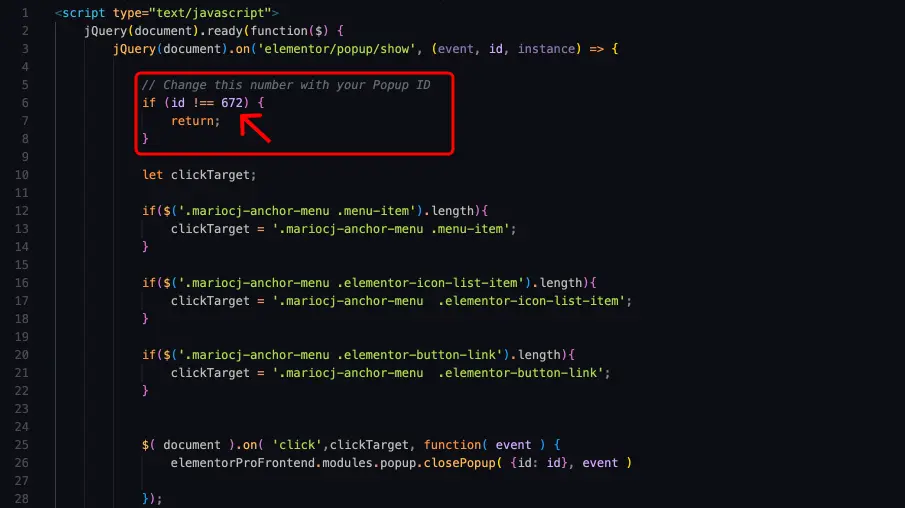
Within the code snippet, you’ll encounter a comment stating “Change this number with your Popup ID,” followed by the condition “if (id !== 672).” This is the sole section of the code that necessitates your attention and modification.
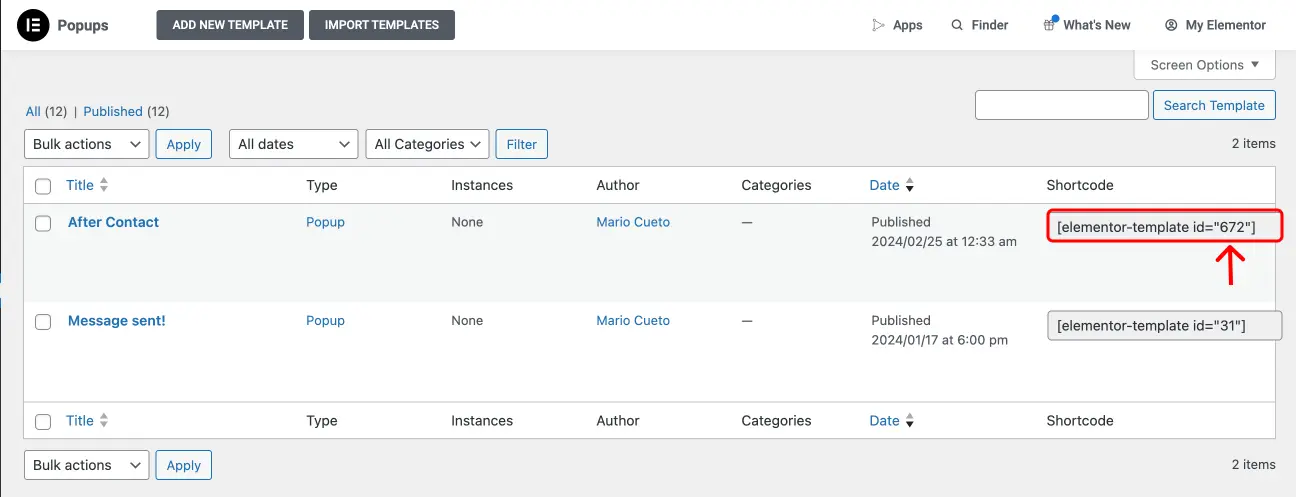
Replace the number ‘672’ with the actual ID of your Popup. This ensures that the code accurately targets and interacts with your specific Popup ID, facilitating seamless functionality.


Step 4: Adding a CSS Class
This code snippet is tailored for popup slide-out menus and is compatible with Elementor’s default WordPress Menu widget, Icon List widget, and Button widget. It’s essential to remember that only one widget can be utilized at a time within your menu setup.
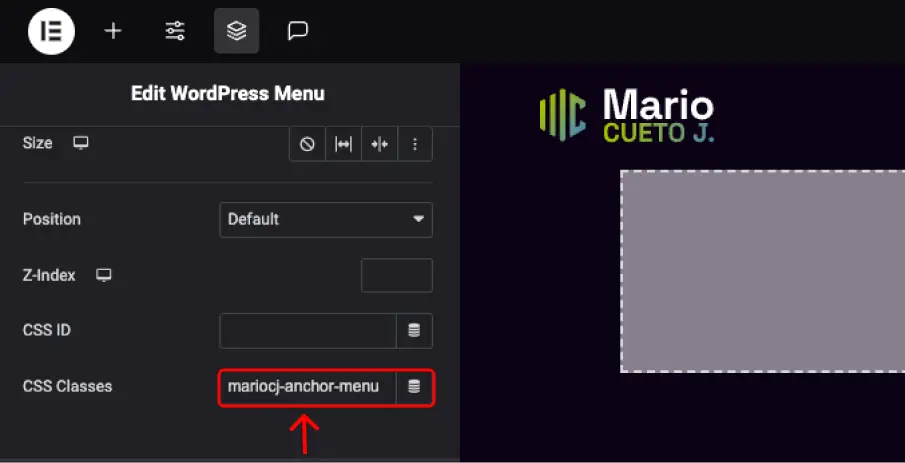
To integrate this functionality into your menu, navigate to the widget you’ve chosen for your popup menu. Then, access the advanced settings tab and paste the following class: ‘mariocj-anchor-menu’.

And there you have it! If you’ve followed the steps correctly, anchor links within your popup mobile menu should now automatically close after being clicked.
Thank you for following along, and keep exploring creative solutions for your website!
